


.jpg)


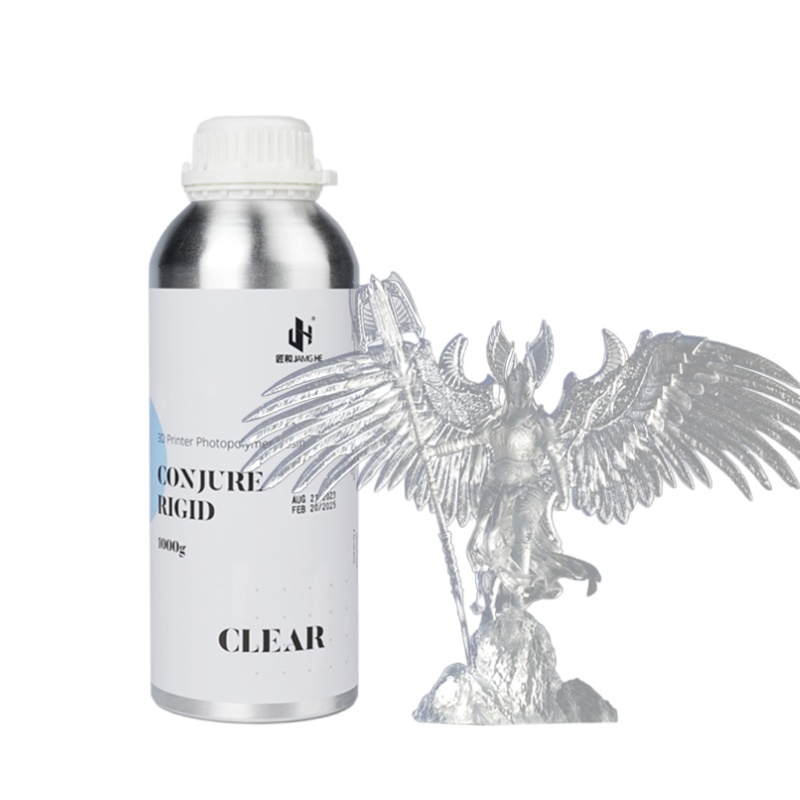


Conjure resin settings
Conjure series resin general setting
| Standard Resin | Functional Resin | |||
 |
 |
 |
 |
|
| Resin Type | Standard 8K | Rigid | Tough | Sculpt |
| PWM Power | 100% | 100% | 100% | 100% |
| Layer Height (mm) | 0.05 | 0.05 | 0.05 | 0.05 |
| Bottom Layer Count | 6 | 6 | 6 | 6 |
| Bottom Exposure Time(s) | 35 | 35 | 35 | 35 |
| Transition Layers Count | 6 | 6 | 6 | 8 |
| Bottom Lift Distance(mm) | 6 | 8 | 8 | 8 |
| Bottom Retract Distance(mm) | 6 | 8 | 8 | 8 |
| Bottom Lift Speed | 180 mm/min 3 mm/s | 180 mm/min 3 mm/s | 180 mm/min 3 mm/s | 60 mm/min 1 mm/s |
| Bottom Retract Speed | 240 mm/min 4 mm/s | 240 mm/min 4 mm/s | 240 mm/min 4 mm/s | 150 mm/min 2.5 mm/s |
| Exposure Time(s) | 2~2.5s | 3~4s | 3~4s | 3~4.5s |
| Lifting Distance(mm) | 6 | 8 | 8 | 8 |
| Retract Distance(mm) | 6 | 8 | 8 | 8 |
| Lifting Speed | 180 mm/min 3 mm/s | 180 mm/min 3 mm/s | 180 mm/min 3 mm/s | 180 mm/min 3 mm/s |
| Retract Speed | 240 mm/min 4 mm/s | 240 mm/min 4 mm/s | 240 mm/min 4 mm/s | 180 mm/min 3 mm/s |
| Light-off Delay (s) | 0~2s base on print size | 0~3s base on print size | 0~3s base on print size | 0~3s base on print size |
Conjure resin TDS
| Standard 8K | Tough | Rigid | Sculpt | Test No | |
| Ultimate Tensile Strength(MPa) | 42.77 | 25.88 | 39.13 | 24.6 | ASTM D638 |
| Tensile Modulus(MPa) | 518 | 310 | 497 | 289 | ASTM D638 |
| Elongation at Break(%) | 15.2% | 50.29% | 35.66% | 32.5% | ASTM D638 |
| Yield point elongation(%) | 6.38 | 5.64 | 5.94 | 5.8 | ASTM D638 |
| Flexural Strength(MPa) | 47.8 | 15.05 | 46.6 | 23.5 | ASTM D790 |
| Flexural Modulus(MPa) | 128.4 | 417 | 966 | 470 | ASTM D790 |
| Notched IZOD(J/m) | 101 | 491 | 364.2 | 217.4 | ASTM D256 |
| HDT @ 0.45 MPa | 66 | 53 | 54 | 52.5 | ASTM D648 |
| HDT @ 1.8 MPa | / | 70 | 70 | 70 | |
| Maximum force point(KGF) | 181.4 | 109.8 | 166.7 | 104.4 | |
| Deformation of the maximum force point(mm) | 7.61 | 33.97 | 6.4 | 18.4 | |
| Shore Hardness | 80-86D | 75-85D | 80-90D | 75-85D | ASTM D2240 |
| Viscosity | 200-400MPa·s | 300-600MPa·s | 250-550MPa·s | 300-650MPa·s | ASTM D445 |
| Density | 1.05-1.25g/cm3 | 1.05-1.13g/cm3 | 1.05-1.13g/cm3 | 1.05-1.13g/cm3 | ASTM D792 |
| Absorption band | 385nm-410nm | 385nm-410nm | 385nm-410nm | 385nm-410nm |
For detailed settings, you can also check the below info(for rigid only):
| ANYCUBIC | Photon / Photon S | Photon Mono / Photon Mono SE / Photon Mono 4K | Photon Mono X | Photon Mono X 6K | Photon Mono M3 | Photon Mono M3 Plus | Photon Mono M3 Max |
| LCD Screen | 5.5 RGB 2K | 6.08-03/ 6.23 4K | 8.9 4K | 9.25 6K | 7.6 4K+ | 9.25 6K | 13.3 |
| PWM Power | 100% | 100% | 80% | 100% | 100% | 100% | 100% |
| Layer Height (mm) | 0.05 | 0.05 | 0.05 | 0.05 | 0.05 | 0.05 | 0.05 |
| Bottom Layer Count | 6 | 6 | 6 | 6 | 5 | 5 | 5 |
| Bottom Exposure Time(s) | 60 | 35 | 30 | 30 | 30 | 30 | 35 |
| Transition Layers Count | N/A | N/A | 6 | 10 | 6 | 6 | 6 |
| Bottom Lift Distance(mm) | 6 | 8 | 8 | 8 | 10 | 10 | 12 |
| Bottom Retract Distance(mm) | 6 | 6 | 8 | 8 | 10 | 10 | 12 |
| Bottom Lift Speed | 60 mm/min 1 mm/s | 180 mm/min 3 mm/s | 60 mm/min 1 mm/s | 60 mm/min 1 mm/s | 60 mm/min 1 mm/s | 60 mm/min 1 mm/s | 30 mm/min 0.5 mm/s |
| Bottom Retract Speed | 150 mm/min 2.5 mm/s | 240 mm/min 4 mm/s | 150 mm/min 2.5 mm/s | 150 mm/min 2.5 mm/s | 150 mm/min 2.5 mm/s | 150 mm/min 2.5 mm/s | 150 mm/min 2.5 mm/s |
| Exposure Time(s) | 12 | 4-4.5 | 3.8-4.5 | 3.8-4.5 | 4-4.5 | 4-4.5 | 4-4.5 |
| Lifting Distance(mm) | 6 | 8 | 8 | 8 | 10 | 10 | 12 |
| Retract Distance(mm) | 6 | 6 | 8 | 8 | 10 | 10 | 12 |
| Lifting Speed | 60 mm/min 1 mm/s | 180 mm/min 3 mm/s | 60 mm/min 1 mm/s | 60 mm/min 1 mm/s | 60 mm/min 1 mm/s | 60 mm/min 1 mm/s | 30 mm/min 0.5 mm/s |
| Retract Speed | 150 mm/min 2.5 mm/s | 240 mm/min 4 mm/s | 180 mm/min 3 mm/s | 180 mm/min 3 mm/s | 180 mm/min 3 mm/s | 180 mm/min 3 mm/s | 180 mm/min 3 mm/s |
| Light-off Delay (s) | 1 | 1 | 2 | 2 | 1 | 3 | 3 |
| ELEGOO | Mars /Mars proMars C | Mars 2 /Mars 2 pro | Mars 3 / Mars 3 pro | Saturn /Saturn S | Saturn 2 | Jupiter |
| LCD Screen | 5.5 RGB 2K | 6.08-04 2K | 6.6 4K | 8.9 4K / 9.1 4K | 10.1 8K | 12.8 6K |
| Layer Height (mm) | 0.05 | 0.05 | 0.05 | 0.05 | 0.05 | 0.05 |
| Bottom Layer Count | 6 | 5 | 5 | 5 | 5 | 5 |
| Bottom Exposure Time(s) | 70 | 45 | 30 | 40 | 45 | 50 |
| Transition Layers Count | N/A | N/A | 6 | 10 | 8 | 8 |
| Bottom Lift Distance(mm) | 7 | 7 | 7 | 7 | 8 | 15 |
| Bottom Retract Distance(mm) | 7 | 7 | 7 | 7 | 8 | 15 |
| Bottom Lift Speed | 60 mm/min 1 mm/s | 60 mm/min 1 mm/s | 60 mm/min 1 mm/s | 60 mm/min 1 mm/s | 60 mm/min 1 mm/s | 30 mm/min 0.5 mm/s |
| Bottom Retract Speed | 150 mm/min 2.5 mm/s | 210 mm/min 3 mm/s | 210 mm/min 3 mm/s | 150 mm/min 2.5 mm/s | 150 mm/min 2.5 mm/s | 150 mm/min 2.5 mm/s |
| Exposure Time(s) | 14 | 4-4.5 | 3.8-4.5 | 3.8-4.5 | 4-4.5 | 5-5.5 |
| Lifting Distance(mm) | 7 | 7 | 7 | 7 | 8 | 15 |
| Retract Distance(mm) | 7 | 7 | 7 | 7 | 8 | 15 |
| Lifting Speed | 60 mm/min 1 mm/s | 60 mm/min 1 mm/s | 60 mm/min 1 mm/s | 60 mm/min 1 mm/s | 180 mm/min 3 mm/s | 30 mm/min 0.5 mm/s |
| Retract Speed | 150 mm/min 2.5 mm/s | 210 mm/min 3 mm/s | 210 mm/min 3 mm/s | 210 mm/min 3 mm/s | 180 mm/min 3 mm/s | 180 mm/min 3 mm/s |
| Rest Time After Retract(s) | 1 | 1 | 1 | 1 | 2 | 2 |
| Light-off Delay (s) | N/A | N/A | N/A | N/A | N/A | N/A |
| Phrozen | Sonic mini | Sonic mini 4K | Sonic mini 8K | Mighty 4K | Mighty 8K | Sonic Mega 8K |
| LCD Screen | 5.5 1080P | 6.1 4K | 7.1 8K | 9.3 4K | 10.1 8K | 15 8K |
| Layer Height (mm) | 0.05 | 0.05 | 0.05 | 0.05 | 0.05 | 0.05 |
| Bottom Layer Count | 6 | 6 | 6 | 6 | 6 | 8 |
| Bottom Exposure Time(s) | 40 | 45 | 35 | 45 | 40 | 50 |
| Transition Layers Count | N/A | 6 | 6 | 6 | 8 | 6 |
| Bottom Lift Distance(mm) | 7 | 8 | 8 | 10 | 10 | 12 |
| Bottom Retract Distance(mm) | 7 | 8 | 8 | 10 | 10 | 12 |
| Bottom Lift Speed | 60 mm/min 1 mm/s | 60 mm/min 1 mm/s | 60 mm/min 1 mm/s | 45 mm/min 0.75 mm/s | 60 mm/min 1 mm/s | 45 mm/min 0.75 mm/s |
| Bottom Retract Speed | 210 mm/min 3 mm/s | 150 mm/min 2.5 mm/s | 150 mm/min 2.5 mm/s | 150 mm/min 2.5 mm/s | 150 mm/min 2.5 mm/s | 150 mm/min 2.5 mm/s |
| Exposure Time(s) | 4-4.5 | 4-4.5 | 3.8-4.5 | 3.8-4.5 | 4-4.5 | 5-5.5 |
| Lifting Distance(mm) | 7 | 8 | 8 | 10 | 10 | 15 |
| Retract Distance(mm) | 7 | 8 | 8 | 10 | 10 | 15 |
| Lifting Speed | 60 mm/min 1 mm/s | 60 mm/min 1 mm/s | 60 mm/min 1 mm/s | 45 mm/min 0.75 mm/s | 180 mm/min 3 mm/s | 45 mm/min 0.75 mm/s |
| Retract Speed | 210 mm/min 3 mm/s | 150 mm/min 2.5 mm/s | 150 mm/min 2.5 mm/s | 150 mm/min 2.5 mm/s | 180 mm/min 3 mm/s | 150 mm/min 2.5 mm/s |
| Rest Time After Retract(s) | 1 | 1 | 1 | 1 | 2 | 6 |
| Light-off Delay (s) | N/A | N/A | N/A | N/A | N/A | N/A |
| CREALITY | LD-002R | LD-002H | LD-006 | HALOT-ONE | HALOT-ONE PROHALOT-ONE PLUS |
| LCD Screen | 5.5 RGB 2K | 6.08-04 | 8.9 4K | 5.96 2K | 7.04 2K/ 7.9 4K |
| Layer Height (mm) | 0.05 | 0.05 | 0.05 | 0.05 | 0.05 |
| Bottom Layer Count | 5 | 5 | 5 | 5 | 6 |
| Bottom Exposure Time(s) | 60 | 45 | 30 | 40 | 50 |
| Transition Layers Count | N/A | N/A | N/A | N/A | N/A |
| Bottom Lift Distance(mm) | 7 | 7 | 7 | 7 | 8 |
| Bottom Retract Distance(mm) | 7 | 7 | 7 | 7 | 8 |
| Bottom Lift Speed | 60 mm/min 1 mm/s | 60 mm/min 1 mm/s | 60 mm/min 1 mm/s | 60 mm/min 1 mm/s | 60 mm/min 1 mm/s |
| Bottom Retract Speed | 150 mm/min 2.5 mm/s | 210 mm/min 3 mm/s | 210 mm/min 3 mm/s | 150 mm/min 2.5 mm/s | 150 mm/min 2.5 mm/s |
| Exposure Time(s) | 9 | 4-4.5 | 3.8-4.5 | 3.8-4.5 | 4-4.5 |
| Lifting Distance(mm) | 7 | 7 | 7 | 7 | 8 |
| Retract Distance(mm) | 7 | 7 | 7 | 7 | 8 |
| Lifting Speed | 60 mm/min 1 mm/s | 60 mm/min 1 mm/s | 60 mm/min 1 mm/s | 60 mm/min 1 mm/s | 60 mm/min 1 mm/s |
| Retract Speed | 210 mm/min 3 mm/s | 210 mm/min 3 mm/s | 210 mm/min 3 mm/s | 210 mm/min 3 mm/s | 150 mm/min 2.5 mm/s |
| Rest Time After Retract(s) | 1 | 1 | 1 | N/A | N/A |
| Light-off Delay (s) | N/A | N/A | N/A | 4 | 4 |
| EPAX | EPAX E6 (E6 mono) | EPAX X10 4K(E10 89mono) | EPAX X133 4K | EPAX X156 4Kcolor |
| LCD Screen | 5.96 2K | 8.9 4K | 13.3 4K | 5.96 2K |
| Layer Height (mm) | 0.05 | 0.05 | 0.05 | 0.05 |
| Bottom Layer Count | 6 | 6 | 6 | 6 |
| Bottom Exposure Time(s) | 40 | 40 | 35 | 80 |
| Transition Layers Count | N/A | 6 | N/A | N/A |
| Bottom Lift Distance(mm) | 7 | 10 | 15 | 15 |
| Bottom Retract Distance(mm) | 7 | 10 | 15 | 15 |
| Bottom Lift Speed | 60 mm/min 1 mm/s | 60 mm/min 1 mm/s | 60 mm/min 1 mm/s | 60 mm/min 1 mm/s |
| Bottom Retract Speed | 150 mm/min 2.5 mm/s | 210 mm/min 3 mm/s | 210 mm/min 3 mm/s | 150 mm/min 2.5 mm/s |
| Exposure Time(s) | 3.8-4.5 | 4-4.5 | 4-4.5 | 12 |
| Lifting Distance(mm) | 7 | 10 | 15 | 15 |
| Retract Distance(mm) | 7 | 10 | 15 | 15 |
| Lifting Speed | 60 mm/min 1 mm/s | 60 mm/min 1 mm/s | 60 mm/min 1 mm/s | 60 mm/min 1 mm/s |
| Retract Speed | 210 mm/min 3 mm/s | 210 mm/min 3 mm/s | 210 mm/min 3 mm/s | 210 mm/min 3 mm/s |
| Rest Time After Retract(s) | 1 | 1 | 1 | 1 |
| Light-off Delay (s) | N/A | N/A | N/A | N/A |


3D Printing Workflow
Make sure to wear nitrile gloves anytime you intend to handle liquid resin.
1. Check the model
Make sure to prepare your model well, to not get a failed print, you should check the orientation, dig hole, and support settings.
CHITUBOX has some great tutorials to explain how to add support
2. Printing profile settings. (exposure time, lift speed, etc.)
Your local printing environment and resin setting greatly affect the final print quality. Conjure series resin requests a temperature of 25-30 ℃.
Conjure resin printing profile guide, Click here
You can also download the exposure test file to get the best settings for your printers. Click here


3. Check printer status before printing
3.1 Make sure your printer vat is clean,(no extra piece in the vat, or it will affect the quality and can damage your machine). there is a video by Nerdtronic Why Resin 3D Prints Fail
3.2 Make sure your plate has been levelled following the manufacturers' instructions for normal resin, it is easy to print, The Conjure series resin, especially for the sculpt resin, has a higher viscosity, you must ensure the bed has been properly levelled before printing, It shallow penetration depth makes the adhesion between layers not very strong. (For bigger printers the levelling is more important)
3.3 Adding more lifting distance and reducing the lifting speed will help to get better results.
4. Shake the resin before use
You need to shake the bottle for a few minis if your resin has not used in a long time.
5. Clean the prints
It is better to clean the resin before post-curing because the chemical reaction is not completed during the initial printing. There is uncured resin left on your prints.
We recommend using Ethanol or IPA and a painter brush (or any brush made of hair) to remove uncured resin. A wash station is a great way to clean prints well.
For some complex print, an ultrasonic cleaner is the best choice to clean it.
6. Dry and post-curing
Dry the prints before curing them, and use 395~405nm UV light for about 60s to cure them. If you need more time to cure the prints, maybe your prints have not cleaned well.
7. Surface Primer and Paint to make the prints more durable
The resin material is not that good in durability compared to the filament. The humidity and light affect it even if it is post-cured.
Advantages of surface primer:
- Colour anti-interference ability, cover the original colour of the model parts to prevent colour deviation.
- Easy to reflect the details after a surface primer base to facilitate the inspection of surface defects and textures.
- The surface primer base has stronger adhesion to the paint to prevent paint loss.
8. Frequently asked printing issue
We also write many articles on CHITUBOX website to help you understand better what printing issue you may meet, and why it happens.
You can learn more detail here:
